
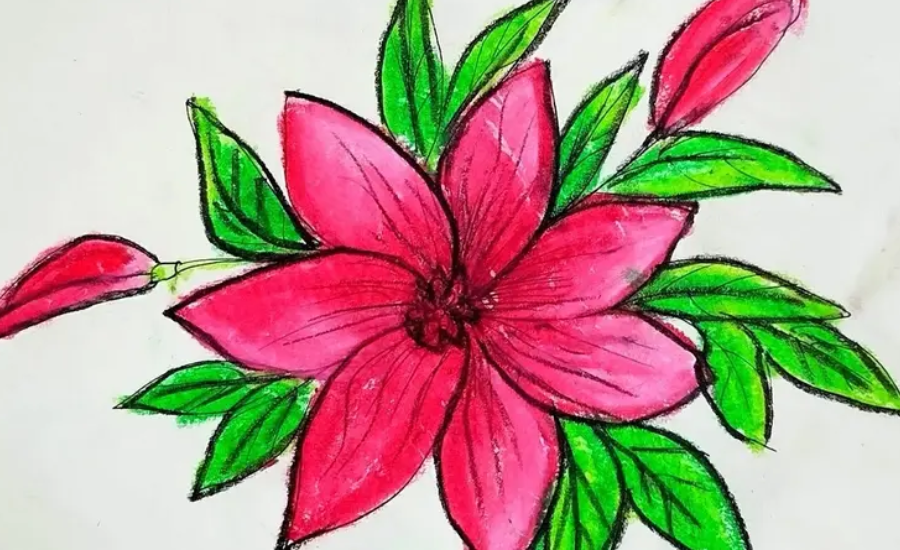
Drawing:b6yad8or5mm= Flower Creating art through flower drawing is not only a rewarding experience but also a wonderful way to express creativity. Whether you’re a seasoned artist or a beginner, the task of portraying the grace and intricacy of flowers on paper can be both enjoyable and fulfilling. This comprehensive guide will introduce you to essential techniques for drawing flowers, offer practical tips to enhance your skills, and present innovative ideas to inspire your next artistic creation. Embrace this opportunity to develop your artistic talents while immersing yourself in the enchanting world of floral art.
Grasping the Anatomy of drawing:b6yad8or5mm= flower
Before embarking on your journey to draw flowers, it’s essential to understand their fundamental structure. Observing the key components of flowers will significantly enhance the accuracy of your artistic representation.
One of the most eye-catching features of a flower is its petals, which come in an array of sizes, shapes, and colors. These vibrant parts often steal the spotlight, capturing the viewer’s attention. Beneath the petals, sepals, which are typically smaller and green, serve to protect the flower bud before it fully opens. Familiarizing yourself with these elements is vital for effectively capturing the true essence of each flower.
The stem, usually cylindrical, acts as the main support for the flower, while the leaves, attached along the stem, can vary widely in shape and size. By accurately depicting these features, your flower drawings will attain a more realistic and lifelike quality, allowing your artistic talents to shine.
The Calming Advantages of Flower Drawing
Engaging in flower drawing can be an incredibly soothing and therapeutic experience. By concentrating on the intricate details of each bloom, you can temporarily escape the pressures of daily life and fully immerse yourself in the artistic journey. Flowers are abundant in almost every setting, providing endless inspiration—whether you choose to draw from live specimens, photographs, or your imagination.
The vivid colors and delicate characteristics of flowers not only make them a captivating subject but also enhance your observational skills and improve hand-eye coordination. This combination of enjoyment and skill development makes flower drawing a rewarding activity that nurtures both your creativity and your artistic abilities.
Steering Clear of Common Errors in Flower Drawing
Starting with the basics is essential, even if you’re eager to dive into drawing detailed flowers. Mastering fundamental shapes and sketching simpler floral forms will create a solid foundation for more complex artwork.
Overloading your drawing with excessive details can sometimes detract from the flower’s inherent beauty. It’s important to convey the flower’s essence without complicating the composition. Focus on the essential features that define the flower’s structure.
Incorporating shading is vital for adding depth and realism to your artwork. Understanding how light interacts with your flower is crucial. Experimenting with various shading techniques will help make your drawing look more lifelike, highlighting areas where light hits and where shadows fall.
Maintaining accurate proportions is also key to achieving a balanced and realistic depiction. As you work, consistently compare different parts of the flower to ensure they are in harmony. Make adjustments as necessary to keep the proportions correct throughout your drawing process.
Selecting the Appropriate Tools for Flower Drawing
Having the right tools can greatly enhance your ability to produce intricate and stunning flower drawings. Here’s a guide to the essential supplies you’ll need to start on the right path.
Utilizing a range of pencils is crucial for achieving various artistic effects. Hard pencils, like 2H, are excellent for outlining fine details, while softer pencils, such as 6B, are perfect for creating rich, smooth shading. This variety allows you to add depth and texture to your artwork, making your flowers come to life.
Choose smooth, high-quality paper that is well-suited for detailed work. Sketch paper with a fine texture or watercolor paper can add an extra layer of dimension to your drawings, depending on your artistic style and technique.
A kneaded eraser is an invaluable tool for refining subtle details or lightening specific areas to create highlights. In addition, a precision-tip eraser can assist with making small, exact corrections. Having both types of erasers will provide you with greater control over the finishing touches of your artwork.
Improving Your Flower Drawing with Helpful Resources
Art books and online tutorials offer a wealth of new techniques and styles that can inspire and enhance your drawing skills. These resources are invaluable for exploring innovative approaches and refining your artistic abilities.
Visiting botanical gardens allows you to observe a diverse range of flower in their natural habitats. Take the time to examine them closely, making notes and capturing photographs for reference when you draw. This firsthand experience adds a layer of authenticity to your artwork.
Developing your flower drawing skills demands regular practice. The more you engage in this practice, the more your skills will progress, resulting in noticeable improvements in your work over time.
Once you feel confident in your abilities and have mastered the basics, think about showcasing your flower drawings. Create a portfolio highlighting your best pieces and share them on social media or in local art exhibitions. This exposure can help you connect with a broader audience and gain recognition for your creative efforts.
Beginning Your Flower Drawing Journey: Must-Have Supplies
Before diving into your flower drawing, it’s essential to gather some basic supplies. While you don’t need a lot, the right tools can significantly enhance your artwork:
Pencils: A selection of pencils ranging from H (hard) to B (soft) provides you with versatility. A 2B pencil is particularly effective for general sketching and shading, striking a balance between hardness and softness.
Paper: Opt for smooth paper for crisp, clean lines, while textured paper can introduce a distinctive effect to your drawings, adding character and depth.
Eraser: A high-quality eraser is crucial for making corrections and can also be used to create highlights, ensuring your work looks polished.
Sharpener: Keeping your pencils sharp is vital for achieving precision and well-defined lines. A good sharpener will help maintain your pencils in optimal condition for detailed work.
A Step-by-Step Approach to Drawing Flowers
Step-by-Step Guide to Drawing a Flower
- Choose Your Flower: Begin with a straightforward flower, like a daisy or tulip, to familiarize yourself with the fundamental shapes and forms.
- Outline the Structure: Lightly sketch the flower’s overall shape using simple geometric forms. For example, use a circle for the center and ovals for the petals to create a strong foundation for your drawing.
- Add Details: Gradually refine your outline by focusing on the specific shapes and symmetry of the petals. Pay attention to the natural flow and contours of the flower to capture its essence.
- Incorporate Shading and Texture: Introduce shading to add depth and dimension to your drawing. Observe how light interacts with the flower, noting where highlights and shadows fall, to enhance the realism of your artwork.
- Polish Your Drawing: Use your eraser to tidy up any rough edges and emphasize the lines that need definition. This final touch will give your flower drawing a neat and polished appearance.
Laying a Solid Foundation for Your Flower Drawing
Start by sketching the essential shapes that form the basis of the flower. Use simple circles to outline the center and ovals or teardrop shapes for the petals. This foundational framework will guide you as you add more intricate details later on.
Once you have established the basic structure, begin to incorporate finer details, such as the texture and curvature of the petals, along with the veins in the leaves. Take your time with this process, focusing on the flower’s natural complexity to bring a sense of realism to your drawing.
Shading is vital for creating a three-dimensional effect in your flower artwork. Start with light strokes and gradually increase the intensity of the shading in the darker areas. This technique will add depth and richness to your drawing, making the flower pop off the page and capturing its beauty more effectively.
Perfecting Blending Techniques for Achieving Realistic Flower Drawings

Blending is crucial for achieving smooth transitions between light and dark areas in your drawings. To create seamless flows between different tones, use a blending stump or a soft piece of tissue to gently soften your pencil strokes. This technique enhances the overall polished and natural appearance of your artwork.
Layering is another effective method for building up tones gradually. Start with lighter shades and progressively move toward darker ones, which adds depth and dimension to your flower depiction. Taking your time with the layering process ensures that your drawing remains balanced and realistic.
To accurately represent the unique textures of various flower components, try different pencil strokes. For instance, use short, sharp strokes to capture the texture of a rose petal, while longer, flowing strokes may be more suitable for illustrating the smooth surfaces of tulips. By mastering texture techniques, you can breathe life into your drawings, making them more vibrant and engaging.
Steering Clear of Common Errors in Flower Drawing
Proportional Errors: Ensuring correct proportions is essential for a realistic flower drawing. Utilize light guidelines to help maintain symmetry and accurately size the various components of the flower.
Over-Detailing: While incorporating details can enhance the visual appeal of your drawing, excessive detailing can lead to a cluttered appearance. Instead, concentrate on the key features that emphasize the flower’s natural beauty.
Neglecting the Light Source: Effective shading relies on a consistent understanding of the light source. Always identify the direction of the light and apply shadows accordingly. This attention to lighting will help create a more lifelike effect in your artwork.
Discovering Artistic Inspiration for Your Floral Creations
Creating art through flower drawing is an intimate and imaginative journey. To ignite your inspiration, venture into nature and immerse yourself in the beauty of flowers in their natural habitats. Take note of their vibrant colors, diverse shapes, and intricate textures. Observing these elements closely can enhance your artistic vision and infuse your work with authenticity, allowing you to convey the true essence of your floral subjects. Embrace these experiences as they can significantly enrich your artistic process and help you develop a unique style.
Final Words
Drawing flowers is a captivating and fulfilling artistic endeavor that allows you to express your creativity. By understanding the anatomy of flowers and observing their intricate details in nature, you can enhance your ability to depict their beauty on paper. Begin your journey by mastering basic shapes and gradually adding details, such as texture and shading, to create lifelike representations.
Using the right tools, such as a variety of pencils and high-quality paper, will elevate your artwork. Regular practice is essential, so set aside time to refine your skills and explore different techniques. To inspire your creations, draw from nature or study floral photography, capturing the essence of each bloom.
Embrace the therapeutic benefits of flower drawing, allowing it to serve as both a creative outlet and a way to unwind. With dedication and passion, you’ll develop a unique style and create stunning floral artwork that resonates with viewers.
Stay in the loop for upcoming updates and alerts! Gravity Internetnet